Before you start:
A free VertiComply account
What you'll have at the end:
A fully configured healthcare app with design preview, compliance standards selected, and code ready to generate.
Sign up and open the app builder
Go to verticomply.com and create a free account. Once logged in, click "New Project" or "Start Building" to open the chat-based app builder. You will see a chat interface on the left and an analysis panel on the right.
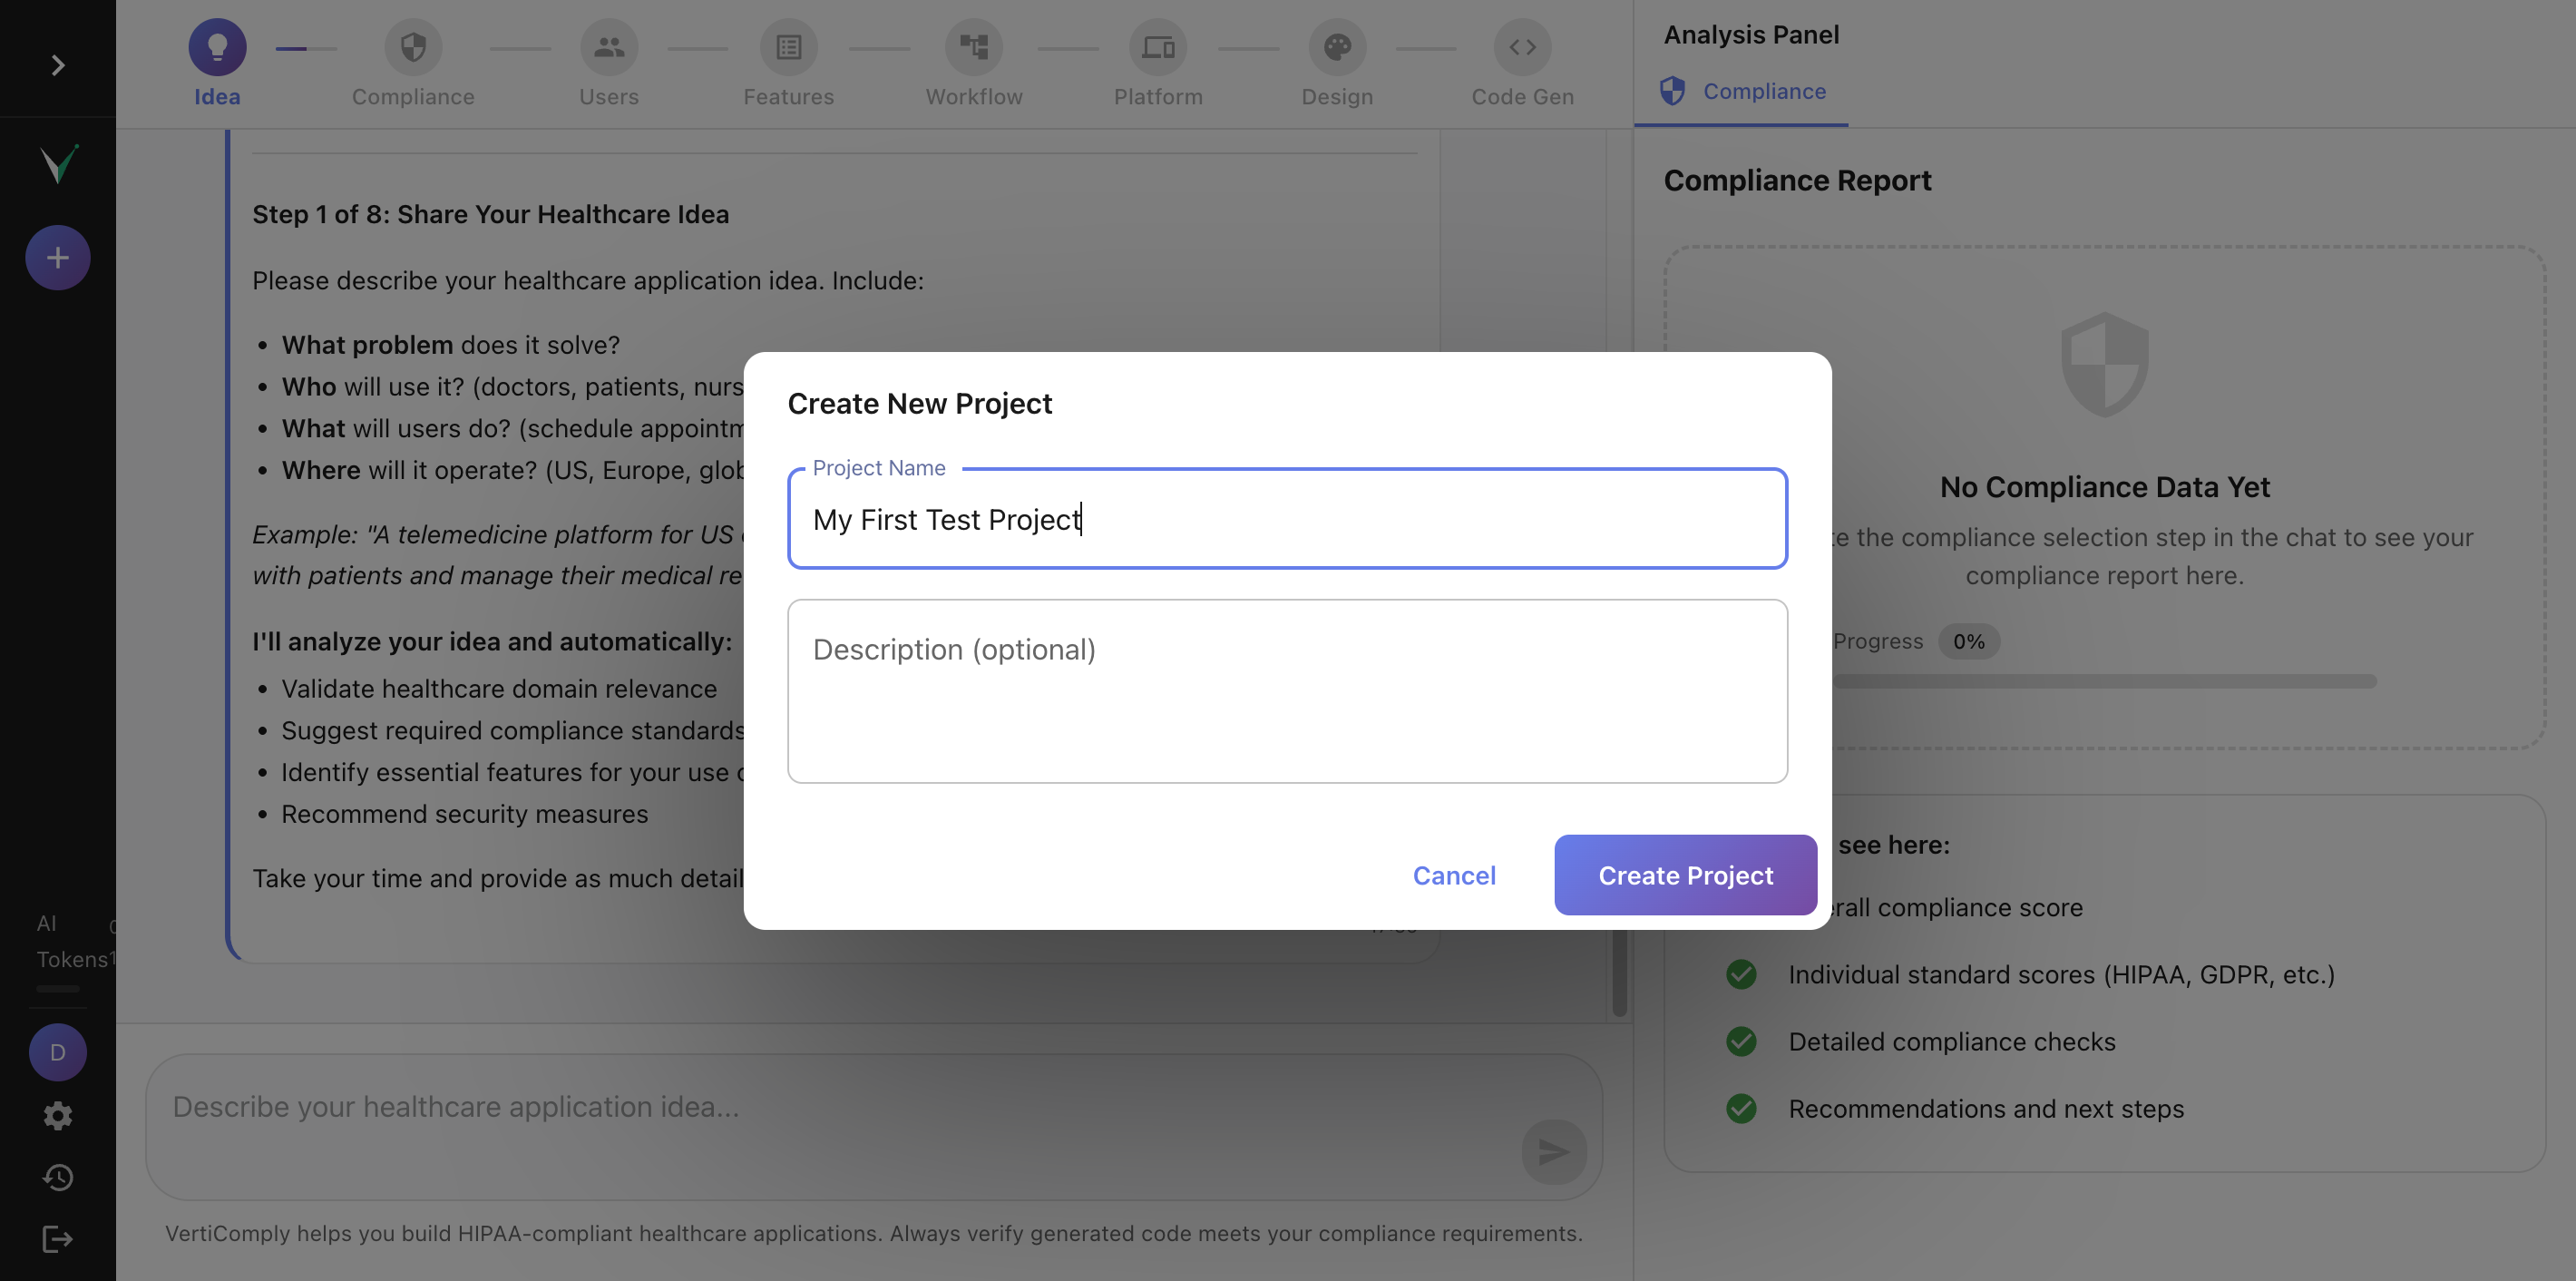
The VertiComply dashboard showing the New Project button and the empty chat interface
Describe your healthcare app idea
Type your app idea in plain English. Be specific about what the app does and who it is for. For example: "Patient portal for a dermatology clinic with appointment booking, secure messaging, and photo upload for skin condition tracking." The AI will classify your idea, detect the domain, and suggest a creative app name.
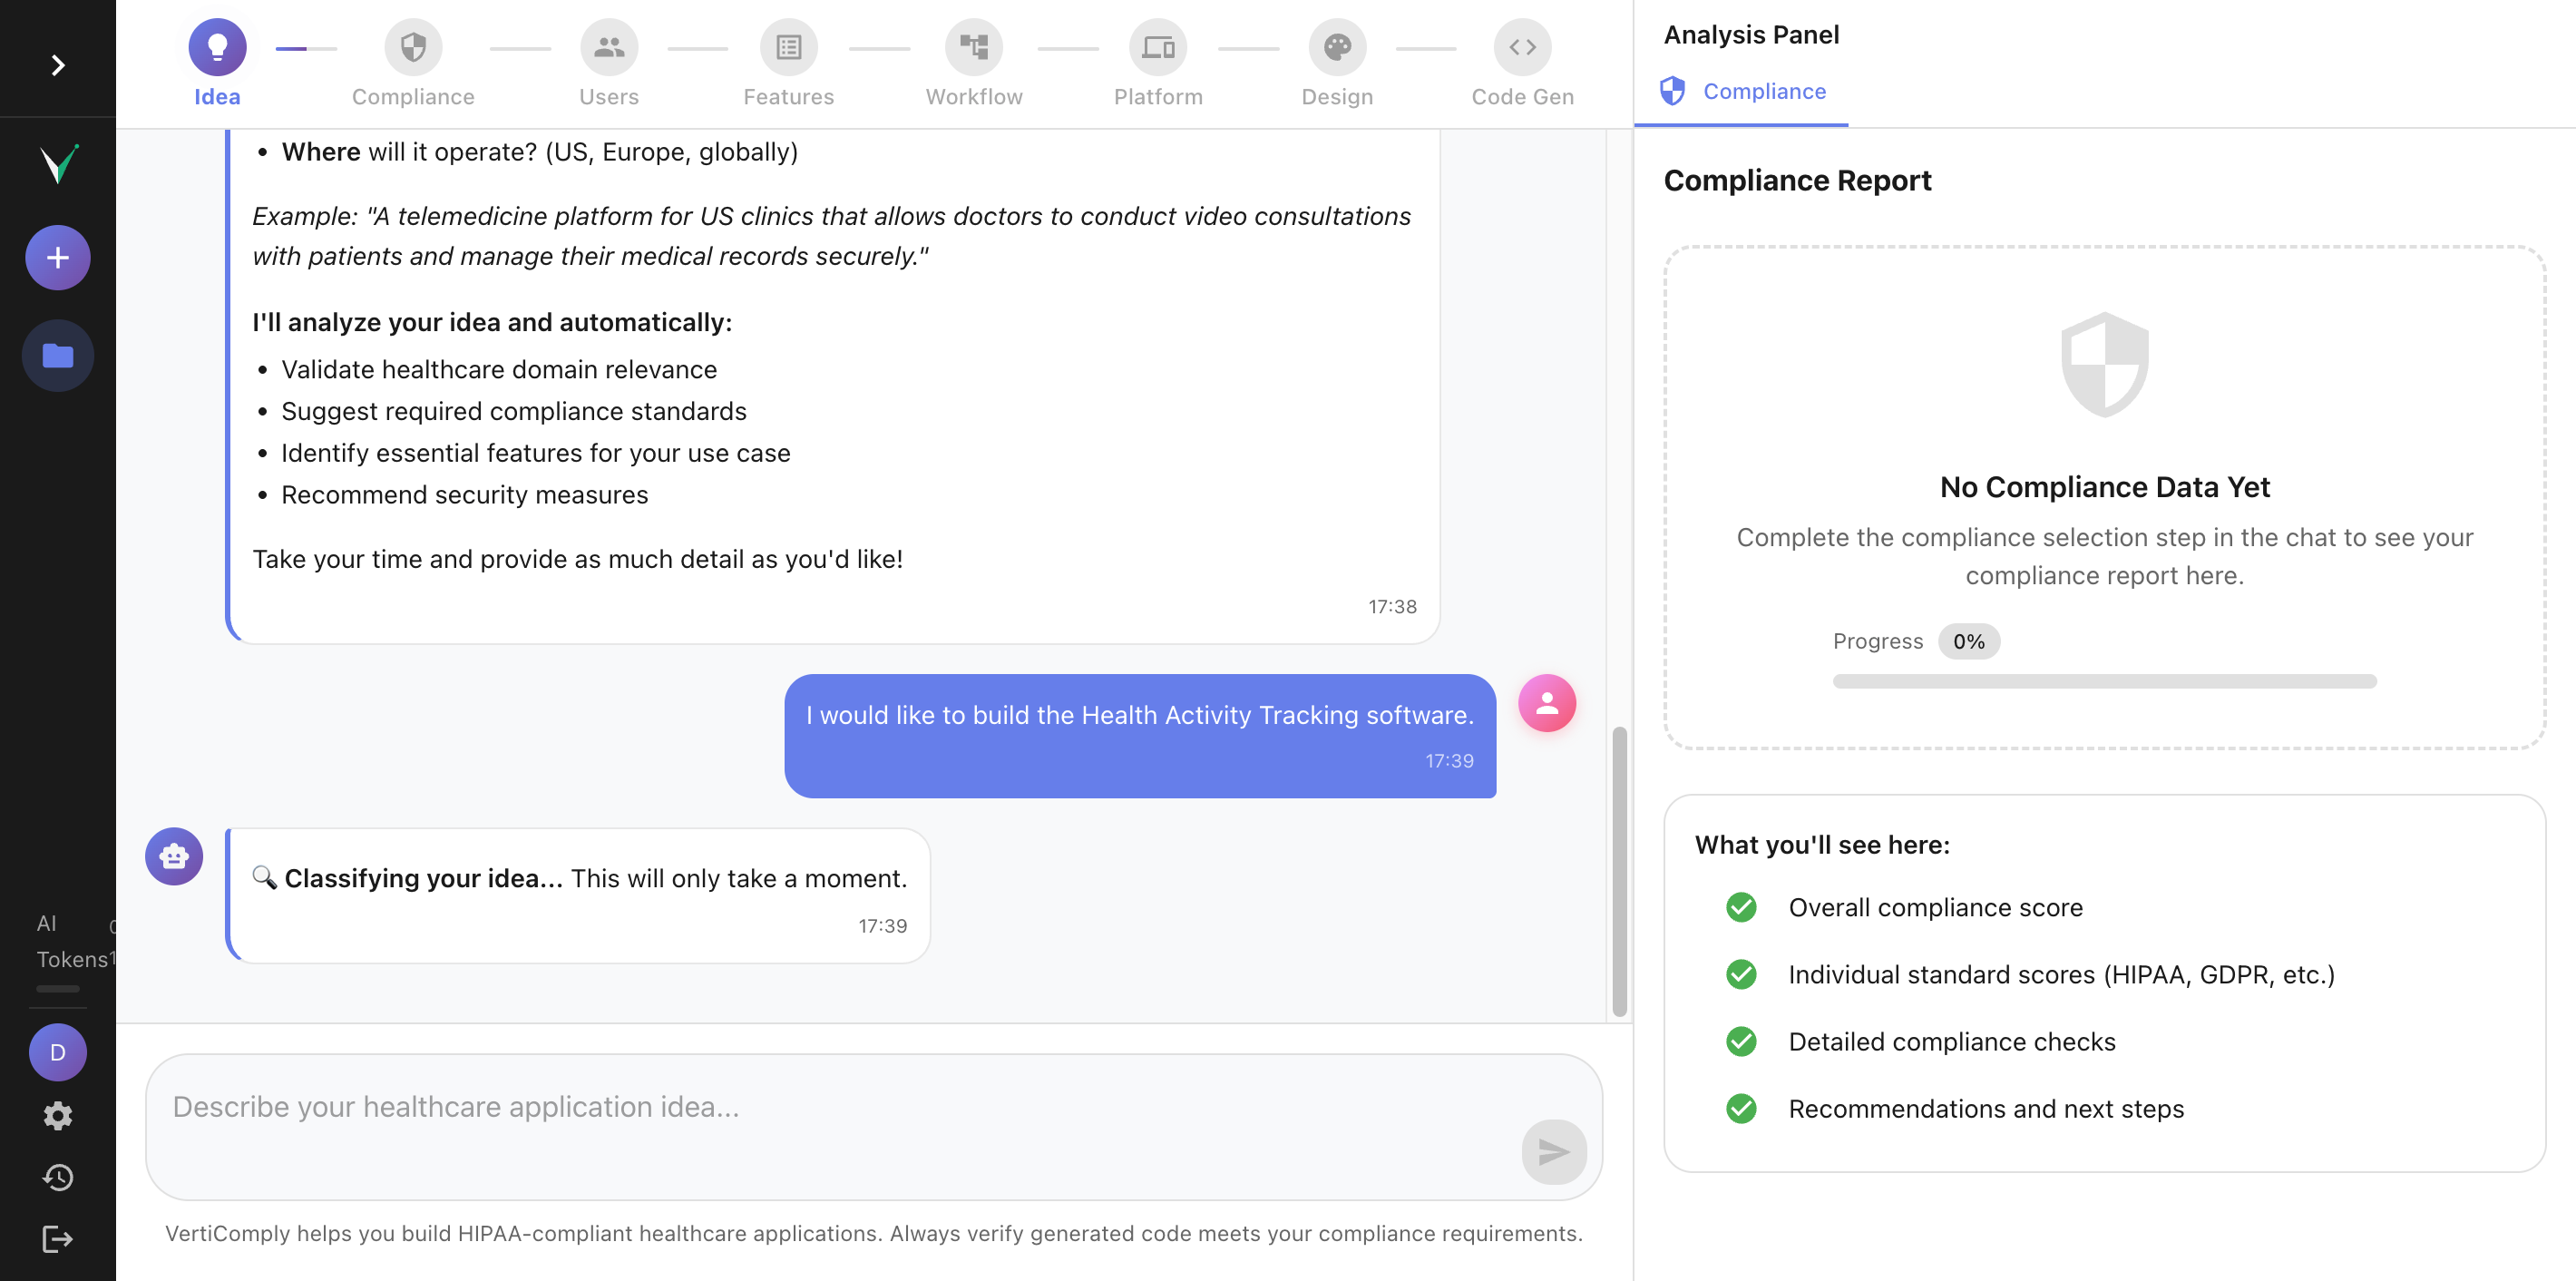
Chat input with a typed healthcare app idea and the AI analyzing message
Tip: The more specific your description, the better the AI recommendations. Mention the specialty, target users, and key features you want.
Select compliance standards
The AI recommends compliance standards based on your idea. For US healthcare apps, HIPAA is always recommended. You will see the recommended standards pre-selected with an "AI Recommended" badge. You can expand to see additional standards like SOC 2, ISO 27001, or EU AI Act. Select all that apply and click Confirm.
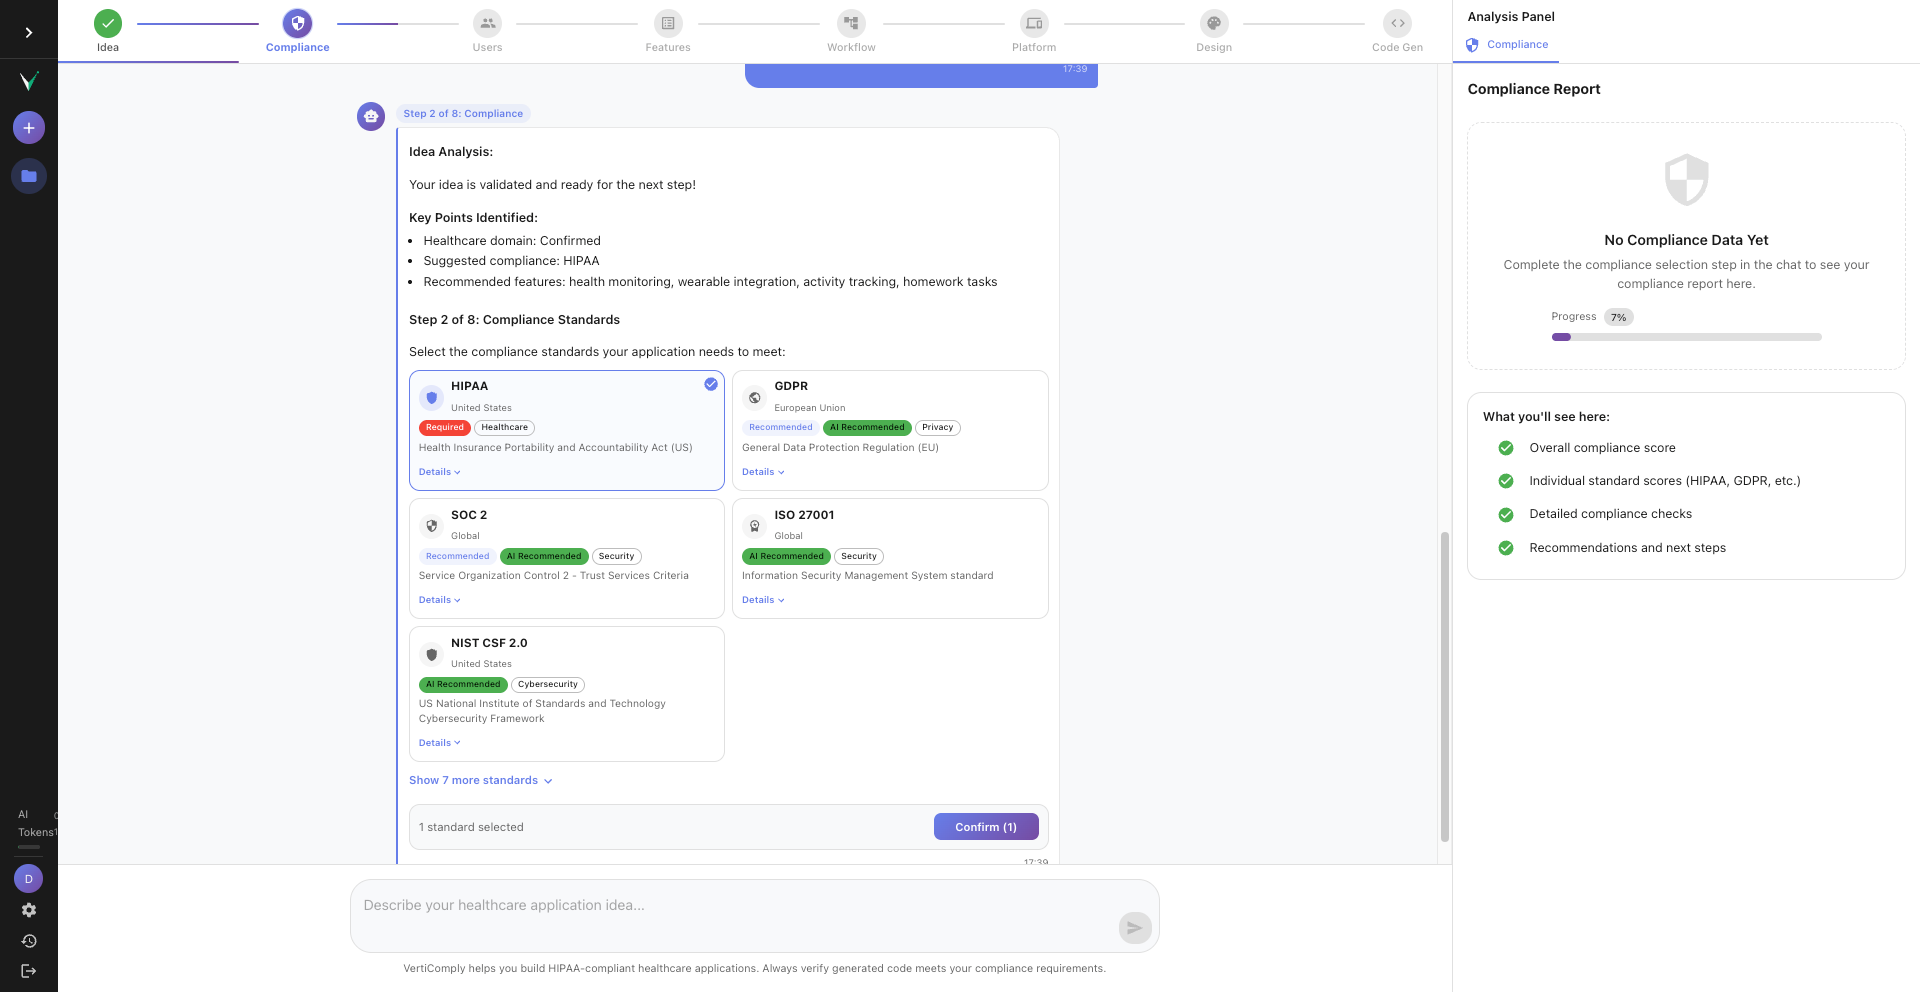
Compliance cards showing HIPAA, GDPR, SOC 2 pre-selected with AI Recommended badges, and a collapsed section showing more standards
Tip: Most US healthcare apps need HIPAA + SOC 2 at minimum. If you serve EU patients, add GDPR. For AI features, consider EU AI Act.
Choose stakeholders
The AI suggests relevant user roles based on your idea and compliance selections. For a dermatology clinic, it might recommend: doctors, patients, nurses, administrators. These become the RBAC roles in your generated code. Select the roles that apply and confirm.
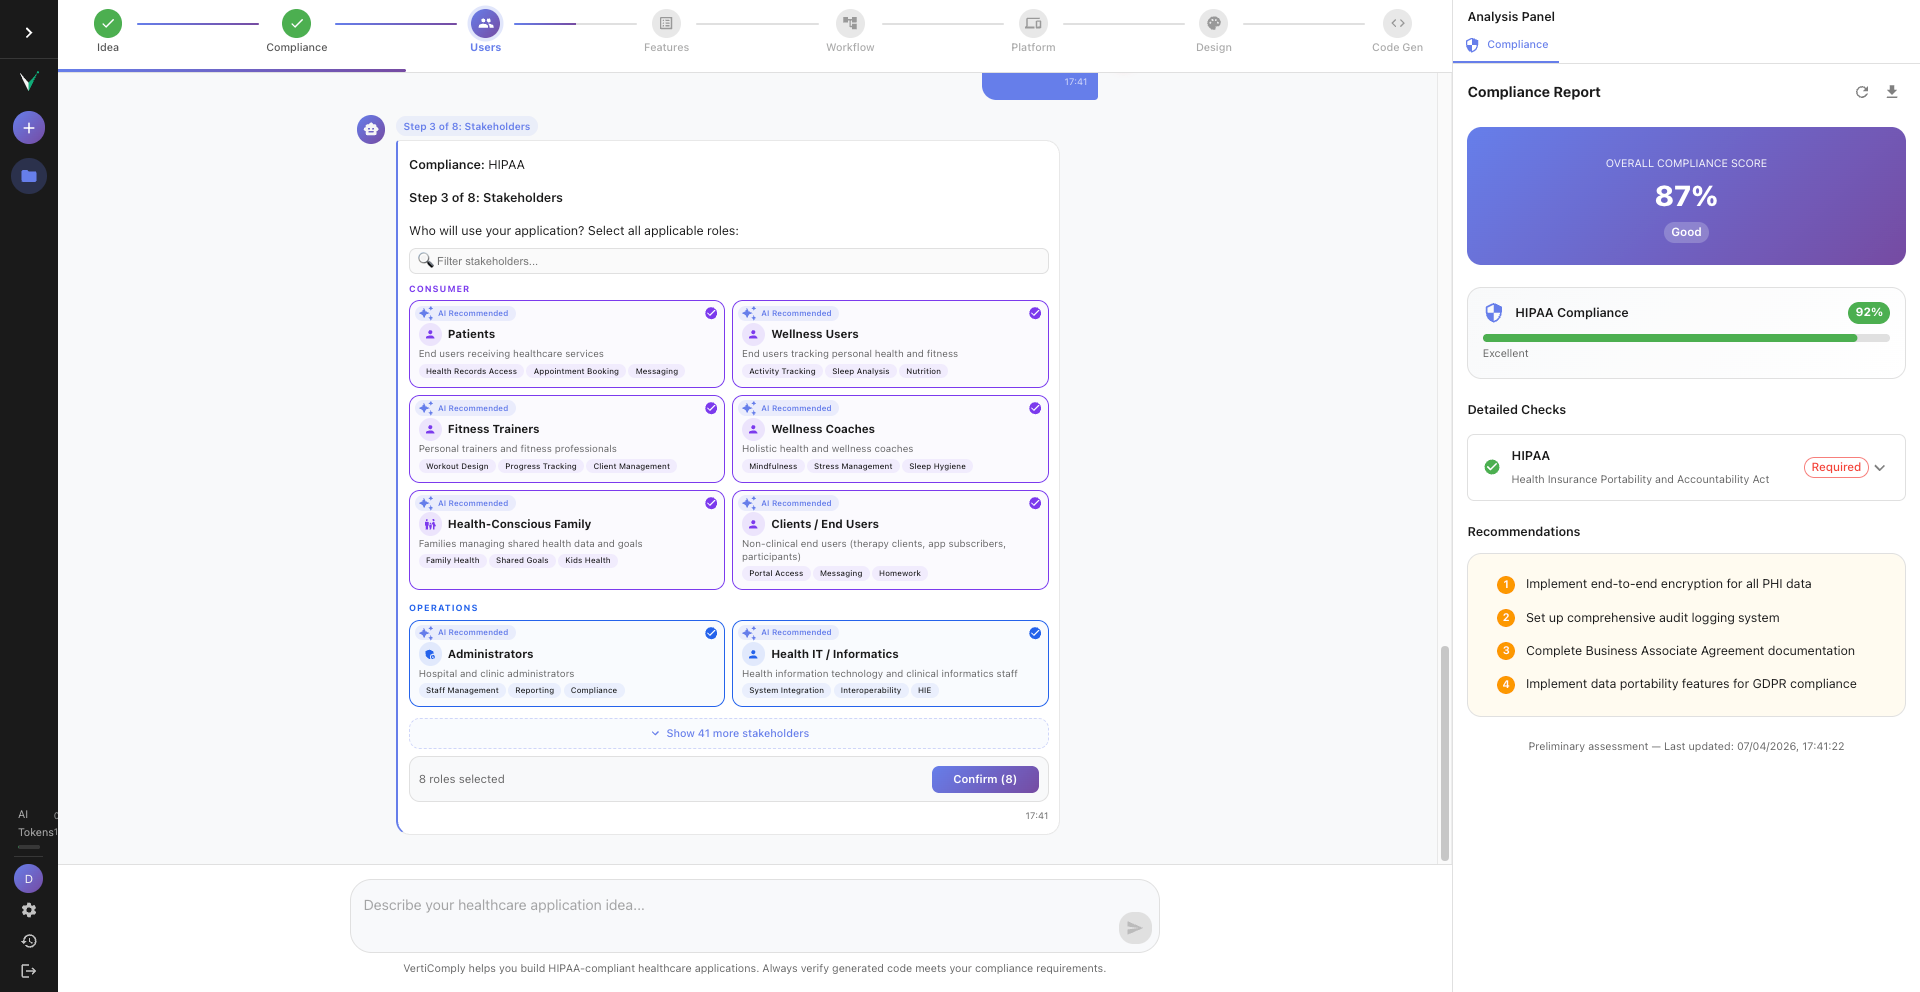
Stakeholder cards showing doctors, patients, nurses, administrators with AI Recommended chips and selection checkmarks
Review and confirm features
Based on your idea, compliance, and stakeholders, the AI suggests features. You will see known features like Patient Management, Appointment Scheduling, and Secure Messaging. For specialty ideas, the AI may suggest novel features specific to your domain. Review the list, add or remove features, and confirm.
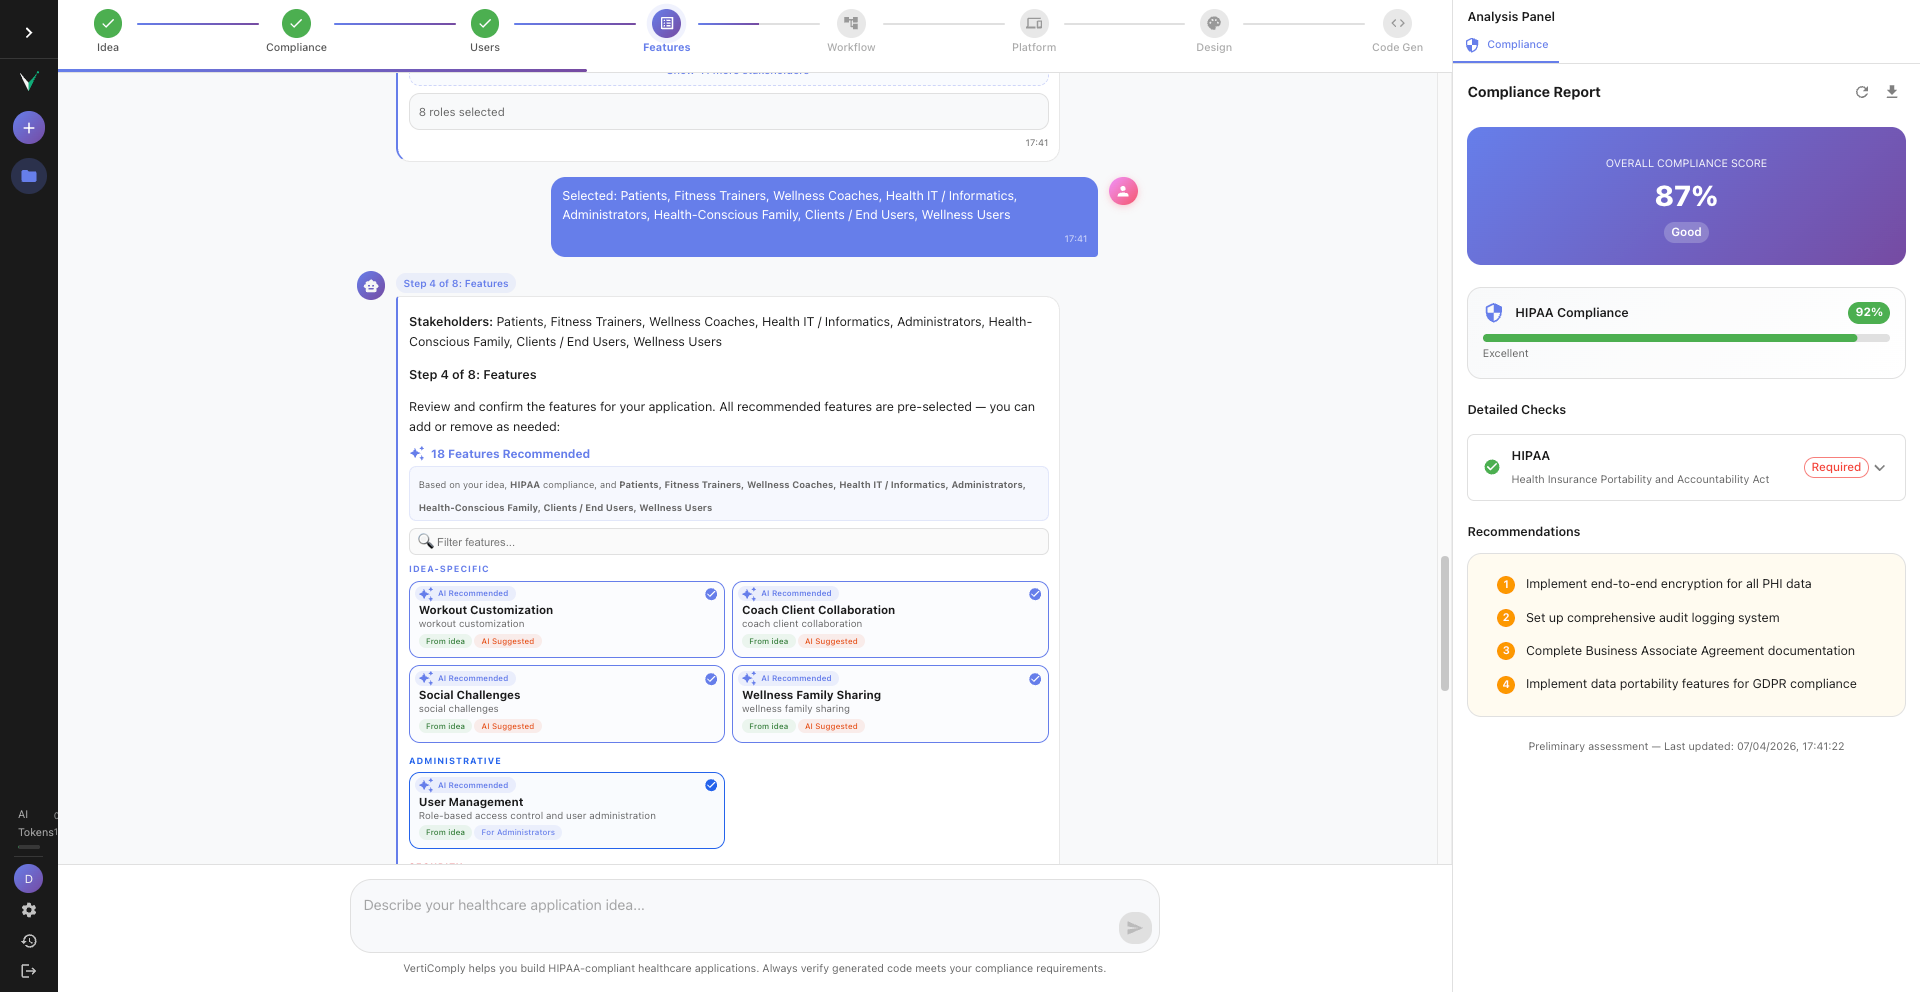
Feature display cards showing Patient Management, Appointment Scheduling, Prescription Management, Secure Messaging with descriptions
Tip: Quality over quantity — 8 to 15 focused features is better than 25 generic ones. You can always add more later.
Select workflows
Workflows define the user journeys in your app. The AI recommends workflows based on your features — for example, Patient Onboarding, Appointment Flow, Diagnosis and Treatment. Each workflow shows the step sequence. Select the relevant ones and confirm.
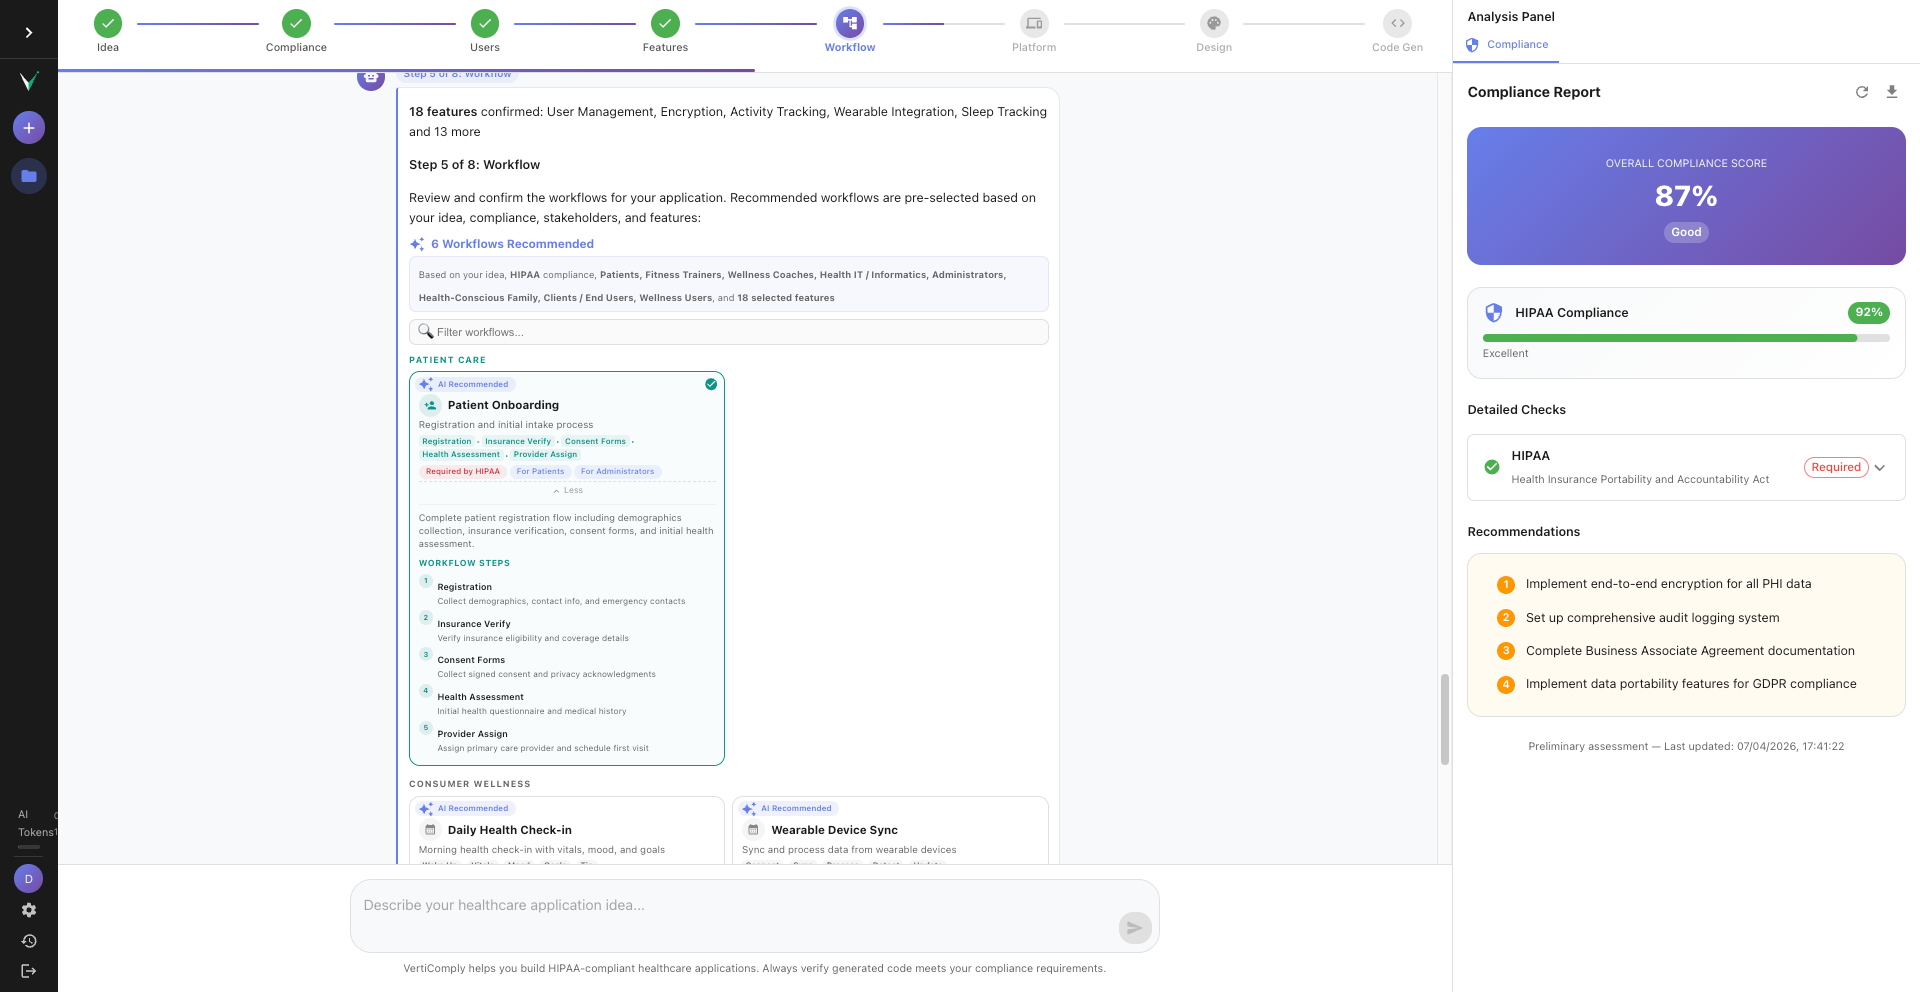
Workflow cards showing Patient Onboarding, Appointment Flow, Diagnosis Treatment with step sequences and category labels
Choose your platform
Select where your app will run. Options include Web Application (React SPA), Progressive Web App (PWA), Cross-Platform Mobile (React Native), Desktop (Electron), or API Only. For most healthcare apps, Web Application is the recommended starting point. The AI auto-selects a design theme based on your choices.
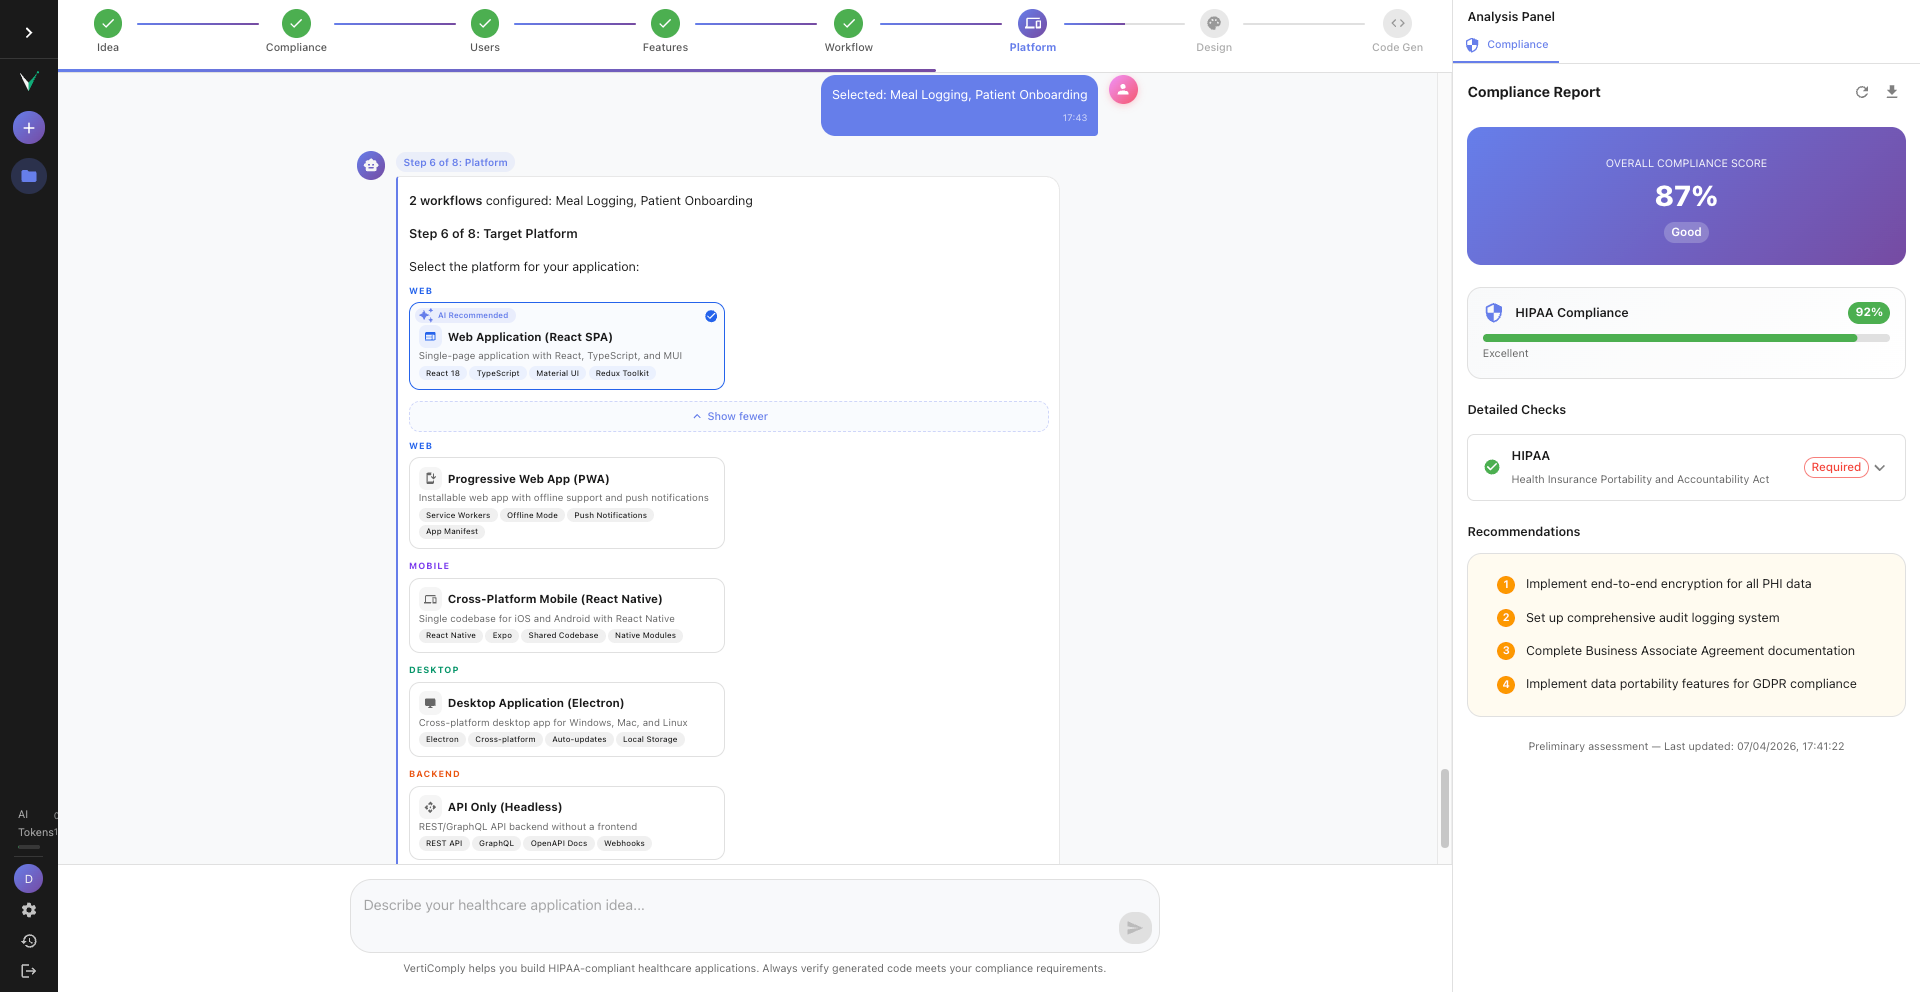
Platform selection cards showing Web SPA recommended, PWA, Cross-Platform Mobile, Desktop, and API Only options
Explore the design preview
After selecting the platform, the right panel switches to the Design Preview tab. This is a live preview of your app — the exact pages, navigation, dashboard, login screen, and data tables your generated code will produce. You can switch design themes, customize colors, and try different layouts. When you are happy with the preview, click Approve to trigger code generation.
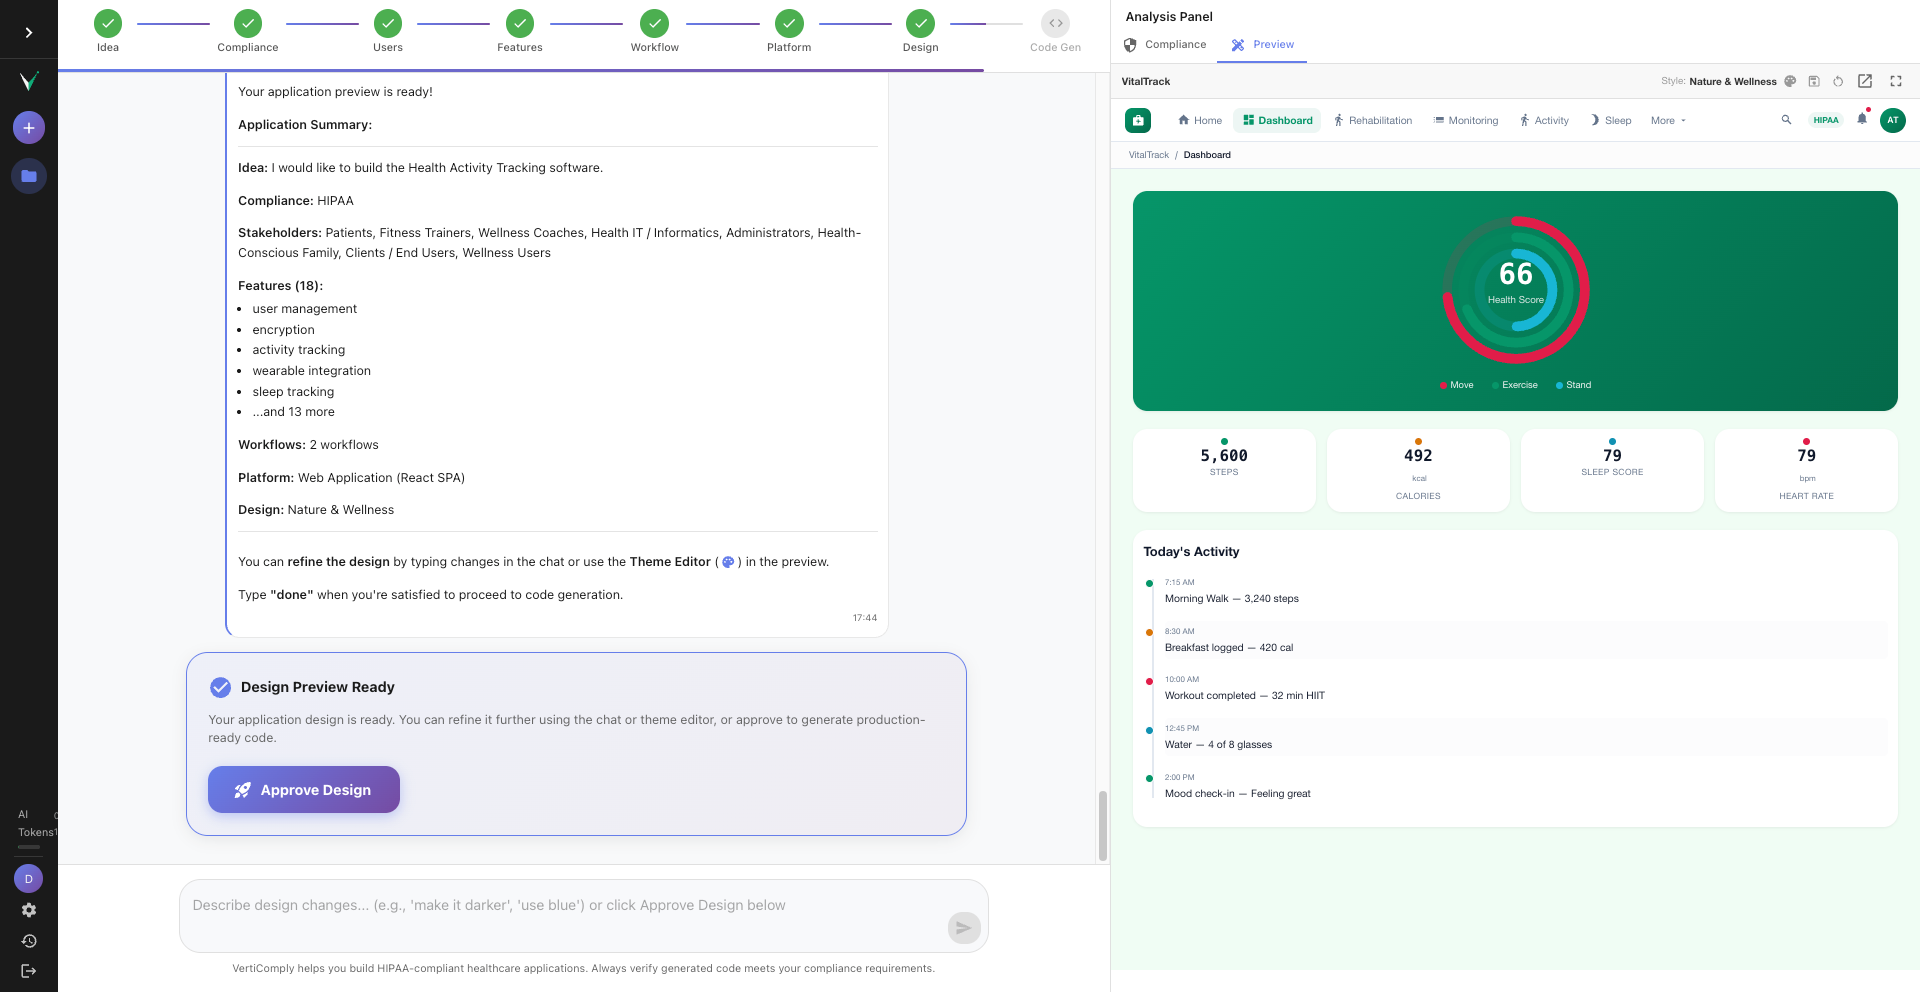
The application design preview showing a healthcare dashboard with navigation sidebar, KPI cards, patient data table, and theme customization controls
Tip: Take your time exploring the preview. Switch between pages using the navigation. Try different themes. The generated code will match this preview.
Next
How to Use the Design Preview
Ready to try it yourself?
Create your free VertiComply account and follow along with this tutorial.
Steps
01
Sign up and open the app builder
02
Describe your healthcare app idea
03
Select compliance standards
04
Choose stakeholders
05
Review and confirm features
06
Select workflows
07
Choose your platform
08
Explore the design preview
Details
Difficulty
Beginner
Time
5 minutes
Steps
8 steps
Category
Getting Started
More Tutorials
How to Use the Design Preview
8 minutes
Topics